Most seasoned hunters will agree that nothing attracts deer more than the sound of an authentic antler rattler. With this otherwise simple tool at your disposal, you can produce the sound of two bucks butting antlers together during the rut, which is almost certain to spark the curiosity of nearby deer. While you can save some time by purchasing a rattler made of faux antlers, they don’t offer the same level of realism as an authentic antler rattler. The bottom line is that you need to use authentic antlers to successfully craft a rattler that’s going to work when you need it most.
Contrary to what some people may believe, creating your own deer antler rattler isn’t an overly difficult process. As long as you have some basic supplies (most importantly a set of antlers) and about 30 minutes of free time, you can create one in just 10-15 minutes of your spare time. It’s a quick and easy way to create an effective deer caller to use on your next hunting trip. Alternatively, you could also give these rattlers away as gifts to people who are hunters.
Supplies You’ll Need To Make an Antler Rattler
Before we start, you’ll need to acquire a few basic supplies and items first. Here are the things you’ll need to make an antler rattler:
- Two sides of a deer antler rack (most people prefer using whitetail antlers, but mule deer or elk will work as well), either separated or still attached. Ideally, the antlers should be hard, durable and with no visible signs of damage or mold.
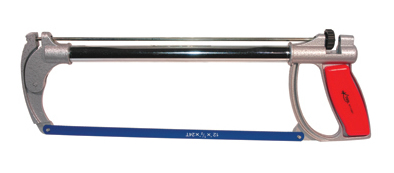
- A hacksaw or reciprocating saw capable of cutting through the dense antlers. Remember, antlers are tough as bone, so your saw needs to have a strong blade to successfully cut through it.
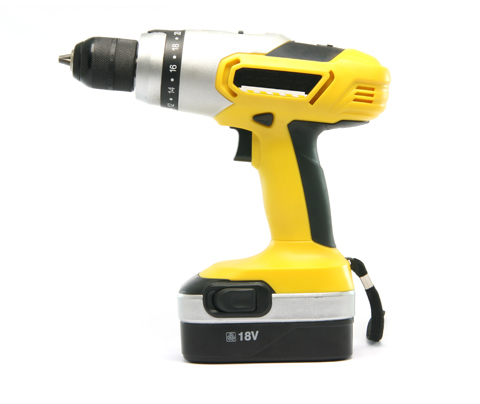
- An electric drill with a 1/4-inch drill bit.
- A couple of sheets of fine-grit sandpaper.
- 2-3 feet of durable nylon cord no larger than 1/4 inch in diameter.
Note: All of these items (with the exception of deer antlers) can be purchased from your local home improvement store. For the best selection of antlers at low prices, check out the store pages here on our website.
Step #1 – Preparing The Antlers
The first step in creating an antler rattler is to gather and prepare all of the necessary supplies. If the antlers are still attached to the skull cap, you’ll need to go ahead and remove them before attempting to use them for a rattler; otherwise, the antlers will remain connected, making it impossible to create a rattler. To accomplish this, make a clean cut where the base of the antler meets the skull cap, known as the burr, using your hacksaw or reciprocating saw. When you’re finished removing one side of the antlers, repeat the process on the other side.
If you haven’t done so already, we recommend cleaning the antlers before connecting them into a rattler. Fresh deer antlers may contain a number of potentially harmful strands of bacteria. Unless you want to risk your health and well-being, take a few minutes to clean and sterilize them. Doing will also help to create a better-looking rattler.
Step #2 – Removing Brow Tines
Most antlers will have a small fork near the base known as a “brow tine” (see deer antler terminology for more info), which can get in the way of rattling if not removed. Some people may leave them on simply because it’s easier, but recommend removing them. Doing so will increase the effectiveness of your rattler by making it easier to use and allowing you to get a more stable grip.
Removing the brow tines is a fairly easy and straightforward process. Place the antlers down on a level surface where you can freely work on it. Next, hold the antler still with your non-dominant hand and use your other hand to saw off the protruding brow tine. Most antler brow tines are short and stubbly, so they should saw off pretty quickly. You can then either toss them in the trash or give them to your dog (assuming you have one) as a treat. All parts of a deer’s antlers (burrs included) make wonderful dog treats, as they are natural, safe and even contain a number of beneficial nutrients and vitamins.
Step #3 – Drilling and Connecting The Cord
Now comes the fun part – drilling. Using a 1/4 inch bit, drill a hole completely through the antler about an inch from the base. Although antlers are quite durable, a power drill should make easy work of it. If you are worried about drilling in the wrong spot, measure up the antler using a ruler or tape measure and mark one inch up using a sharpie. You can then drill directly on the mark for a more precise
Once finished, take your nylon rope and guide one end of it through the hole you previously made. To keep the rope from simply falling out, you’ll need to tie a knot at the end of it so it will catch on the antler if pulled. Next, slide the other end of the nylon rope through the other antler and finish it with a knot as well. You now have a fully-functional antler rattler that can be used to draw the attention of nearby deer! But wait, we’re not quite done yet…
Step #4 – Finishing Your Rattler
You’re probably eager to go off and test your rattler, but you there are a couple of things left to do. Grab your saw once again and saw off about an inch of the top points from both antlers. What’s the purpose of this? There have been several cases of hunters falling on their own rattlers and having the tips impale their bodies. The 2-3 minutes it takes to remove them could potentially save you a trip to the emergency room. Once you’ve removed the tips, use some sandpaper and sand down all the remaining tips and tines.
Congratulations! You’ve now made your very own deer antler rattler.