One of the benefits of purchasing antlers from a marketplace or shop, such as our website, is that they are usually already cleaned, sterilized, and ready for you to work with. However, if you are a hunter who acquired them from game you’ve killed, you’ll need to know how to clean them before using them for any crafts or projects. Although you can’t see it with the naked eye, fresh, uncleaned deer antlers contain a number of potentially harmful bacteria. Working and touching these antlers places you at risk of catching some pretty nasty diseases and illnesses, which is something that you probably want to avoid.
Whether you have fresh or old deer antlers, it’s important to take the time to properly clean them. Fresh antlers must be cleaned to eliminate bacteria and germs, while old ones are cleaned to maintain an attractive appearance. Thankfully, cleaning and sanitizing both fresh and old antlers is a simple and straightforward process that anyone can do. Just follow the steps below and you’ll be well on your way to having clean antlers without the risk of
Cleaning Fresh Antlers
The purpose of cleaning fresh antlers is to remove dirt, debris and any remaining blood or hair on them. Let’s face it, no one wants to work with antlers if they still have hair or flesh on them, which is why it’s important to properly clean them beforehand. The 20-30 minutes it takes to clean them will eliminate bacteria and make them easier to work with.
Step #1 – Separating From The Skull Cap
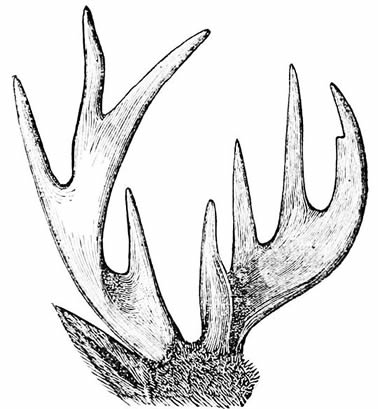
There are a dozen different ways to clean fresh antlers, but the first step remains the same – you must physically remove the antlers from the boney rectangular area known as the skull cap. Deer antlers naturally grow out from the skull cap, so it’s going to take a little bit of elbow grease to remove them.
To remove the antlers from the skull cap, take a hacksaw and firmly saw each antler at the base where it attaches to the cap. Because of their unusual shape, you may need to secure the antlers to prevent the saw blade from moving around during this step. Continue cutting through the base of the antlers until they’ve separated from the skull cap. After doing so, you should then be left with two separate antlers.
Step #2 – Scrubbing
After you’ve separated them from the skull cap, you’ll then want to scrub them down with a wire brush to remove any remaining hair or organic matter on them.
You don’t have to use some fancy brush, as a basic grill cleaning model will do just fine. You can find wire grill brushes available for sale at most home improvement stores and even some supermarkets. Pay close attention to the area around the base of the antlers, as this is where the hair and flesh will remain. Give it a good scrub and it should come off without much effort.
Step #3 – Boiling Water
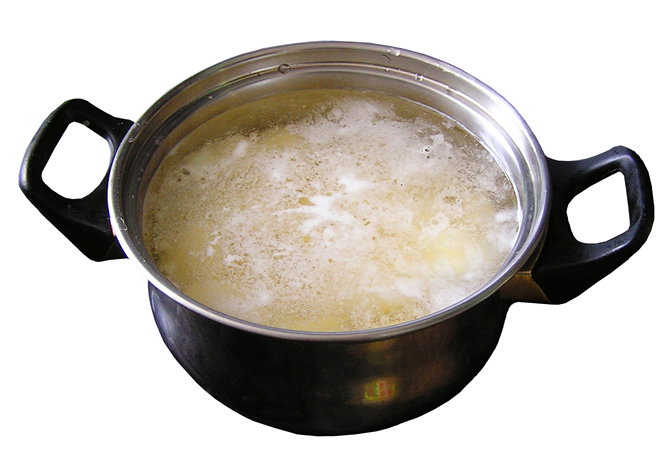
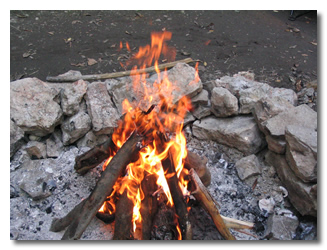
The third step to cleaning fresh deer antlers involves boiling them in water. Some people may feel a little awkward boiling antlers, but it’s necessary to kill off any bacteria thriving on them.
Fill a large cooking pot (large enough to hold most of the antler in) with water and a few dashes of salt. Place the pot on a stove or over a fire pit and wait for the water to boil. I recommend doing this outside over a fire, as it may produce a rather funky smell that will linger for some time. Trust me, you don’t want to stink up the inside of your home by trying to clean some antlers.
Step #4 – Finishing Up
Let the antlers boil for about 25-30 minutes. If they aren’t completely submerged in the pot, you’ll need to adjust them so every inch of the antler touches the boiling water. Depending on how large and complex your antlers are, this may or may not be an easy process. If you having trouble getting them to stay underwater, use a metal kitchen utensil to help hold them down.
After the antlers are done boiling, take them out and let them air-dry outside. Antlers are usually soft and sponge-like immediately after being boiled, but they will revert back to their hardened state after drying. Be careful to not leave them exposed in the sun for longer than a day, as the sun will begin bleaching the natural color of the antlers.
Cleaning Old Antlers and Antler Items
Even old antlers will need cleaning once in a while. If you have antler furniture or items, such as chandeliers, lamps, or centerpieces, you’ll need to clean them to keep dust and dirt from building up over time. This is a much easier process than cleaning fresh antlers, as there’s no organic matter to remove.
You can clean most antlers with just a wet towel or cloth and a drop of soap. Take the cloth and run it under warm water with soap and wring it out. Be sure not to use a completely soaked cloth, as too much water will do more harm than good. Take the damp cloth and wipe them down as you see fit. If there’s dirt built up on the antlers, you may need to use scrub it with a bit more force. Some people use bleach when cleaning their antlers, but I’ve found this can strip the color from the antlers, leaving them looking dull. Once you are done, go back over the antlers with a clean towel to dry off any excess moisture.
These steps work amazing to clean antlers BUT just like bleach, NEVER USE SOAP. Soap will discolor the antlers just like bleach will. I have found that after a good cleaning to use wax based spray on furniture polish works amazing and really brings out the color!